[DIY] Add a power jack to the Elefun
My daughter owns a Playskool Poppin Park Pink Elephant Busy Ball Popper and she loves it despites of the ridiculously loud fan noise.
Unfortunately this beast drains a lot of power (about 6W), so instead of buying new batteries, I added a power plug on the back. Here is a tutorial if you want to do the same to yours.

3 or 4 batteries ?
In most device, adding a power plug is extremely simple: you just add the two pins of the plug in parallel with the battery pack. But in the Elefun case, it’s a little more complicated.
Here is a simplified schematic:
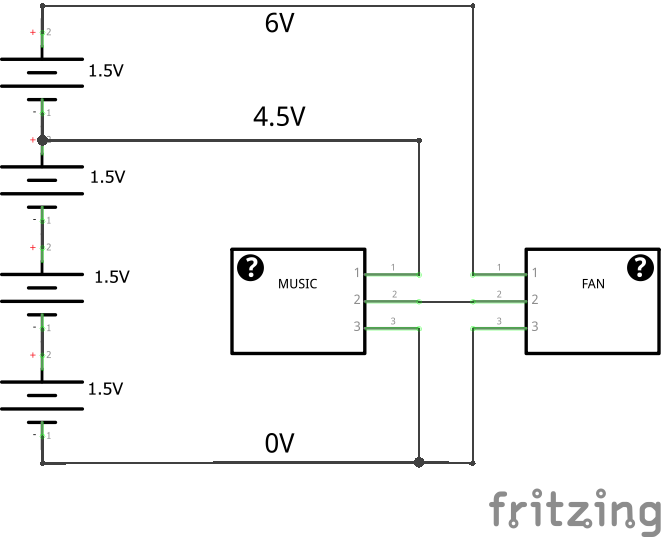
As you can see, the sound part is powered by 3 batteries, and the motor by 4. This is why you can use the toys with the music only (with fan off) when you remove the last battery.
Voltage drop
This means we need to provide the two voltages to the Elefun. This was easy with the batteries, but for the power jack we need a way to drop the voltage from 6V to 4.5V. I decided to use two diodes in series:
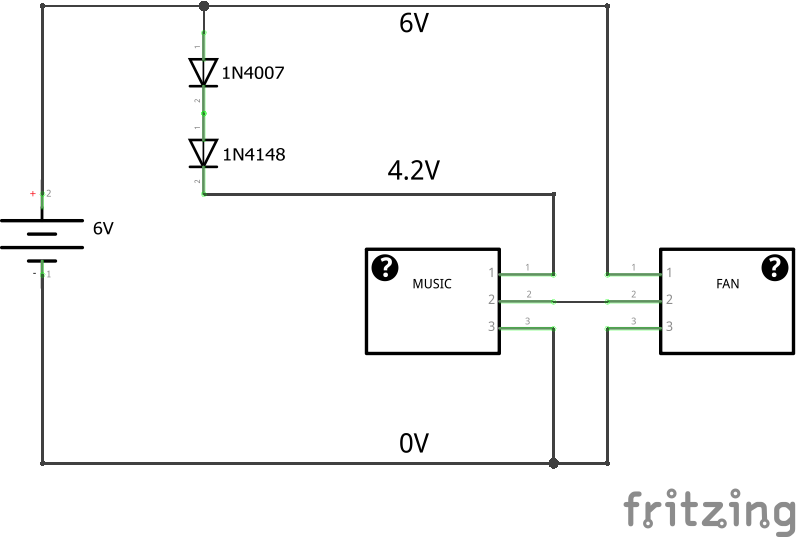
As you see, I used two different diodes:
- A 1N4007 which has a voltage drop of 1.1V
- A 1N4148 which has a voltage drop of 0.7V
So the total drop is 1.8V, which gives 4.2V instead of 4.5V, but that’s enough. Also, note that it would be a bad idea to have a drop smaller than that because one of the 1.5V batteries would discharge through the diodes.
Here is the schematic after modifications:

WARNING: I strongly recommend to remove the batteries (at least the one on the top) when the power jack is connected.
Hands on!
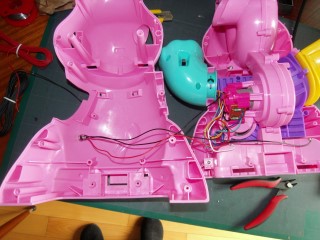
The really hard part of the job is to disassemble and reassemble the toys.
Fix the plug
My advice is to put the plug where there is a lot of free room: on the opposite side of the motor.

Solder the diodes
Once it’s open, you can get the battery holder out and solder the two diodes between the white and the red wires.
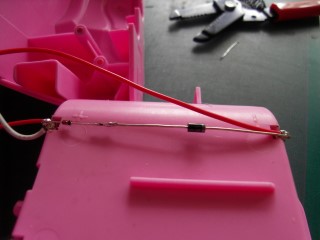
Note that the rings are pointing to the red wire on the right (the other red wire on the left is the one I added)
Solder the plug
Now you just need to solder the wires according to the schematic.
Enjoy!
Once you manage to reassemble the Elefun, you can plug it to a universal power supply: you need one that provides at least 1A of current.
Don’t forget to select 6V or the voltage.
Check the pin polarity before plugging it. I used plus in the center, and minus in the outside.